
准备工作
硬件
软路由(如j4125),需要支持minipcie
移远RM520N(M.2 KEY B接口)
M.2 KEY B转minipcie的转换模块
软件
安装PVE系统
移远RM520N官方提供的驱动和拨号软件
PVE使用RM520N
安装驱动
安装编译需要的工具
apt install make gcc pve-headers-`uname -r` dkms usb-modeswitch wpasupplicant net-tools安装官方驱动
使用WinSCP工具上传驱动**Quectel_Linux_Android_QMI_WWAN_Driver_V1.2.6.zip**到PVE中。
解压并进入目录,执行**make install**
root@pve:~/wwan/Quectel_Linux_Android_QMI_WWAN_Driver_V1.2.6# make install如果出现如下错误
root@pve:~/Quectel_Linux_Android_QMI_WWAN_Driver_V1.2.6# make install
make ARCH=x86_64 CROSS_COMPILE= -C /lib/modules/6.5.11-8-pve/build M=/root/Quectel_Linux_Android_QMI_WWAN_Driver_V1.2.6 modules
make[1]: Entering directory '/usr/src/linux-headers-6.5.11-8-pve'
CC [M] /root/Quectel_Linux_Android_QMI_WWAN_Driver_V1.2.6/qmi_wwan_q.o
/root/Quectel_Linux_Android_QMI_WWAN_Driver_V1.2.6/qmi_wwan_q.c: In function ‘_rmnet_vnd_get_stats64’:
/root/Quectel_Linux_Android_QMI_WWAN_Driver_V1.2.6/qmi_wwan_q.c:850:33: error: implicit declaration of function ‘u64_stats_fetch_begin_irq’; did you mean ‘u64_stats_fetch_begin’? [-Werror=implicit-function-declaration]
850 | start = u64_stats_fetch_begin_irq(&stats64->syncp);
| ^~~~~~~~~~~~~~~~~~~~~~~~~
| u64_stats_fetch_begin
/root/Quectel_Linux_Android_QMI_WWAN_Driver_V1.2.6/qmi_wwan_q.c:855:26: error: implicit declaration of function ‘u64_stats_fetch_retry_irq’; did you mean ‘u64_stats_fetch_retry’? [-Werror=implicit-function-declaration]
855 | } while (u64_stats_fetch_retry_irq(&stats64->syncp, start));
| ^~~~~~~~~~~~~~~~~~~~~~~~~
| u64_stats_fetch_retry
cc1: some warnings being treated as errors
make[3]: *** [scripts/Makefile.build:251: /root/Quectel_Linux_Android_QMI_WWAN_Driver_V1.2.6/qmi_wwan_q.o] Error 1
make[2]: *** [/usr/src/linux-headers-6.5.11-8-pve/Makefile:2039: /root/Quectel_Linux_Android_QMI_WWAN_Driver_V1.2.6] Error 2
make[1]: *** [Makefile:234: __sub-make] Error 2
make[1]: Leaving directory '/usr/src/linux-headers-6.5.11-8-pve'
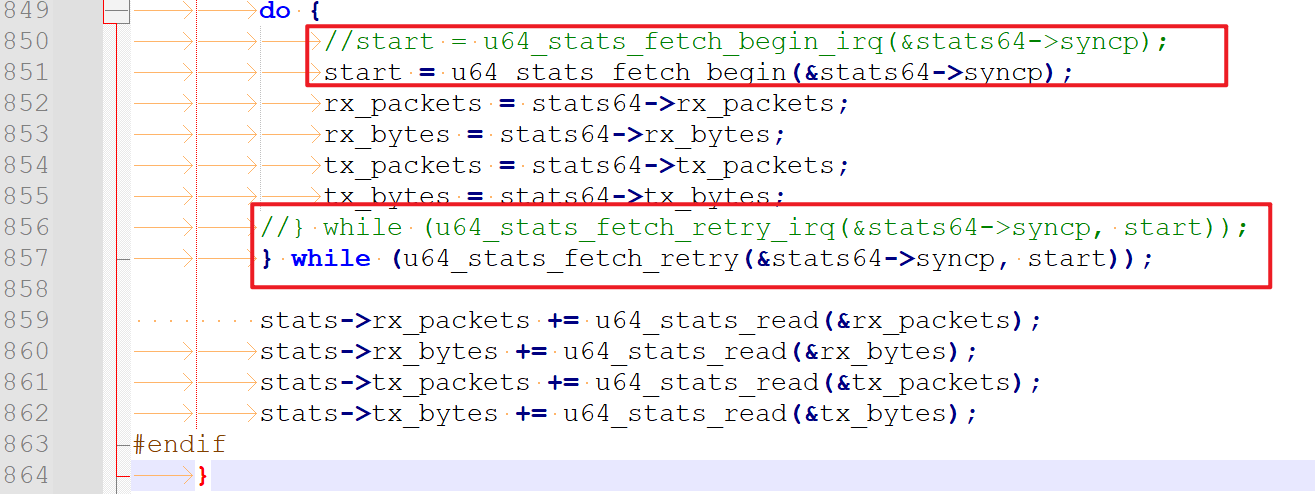
make: *** [Makefile:28: default] Error 2修改源文件**qmi_wwan_q.c**。
将**u64_stats_fetch_begin_irq()** 替换为**u64_stats_fetch_begin()**。
将**u64_stats_fetch_retry_irq()** 替换为**u64_stats_fetch_retry()**。
如下所示:
拨号
编译quectel-CM
使用WinSCP将官方的拨号软件**Quectel_QConnectManager_Linux_V1.6.5.zip**上传到PVE中,解压并进入目录,执行**make**命令
root@pve:~/wwan/Quectel_QConnectManager_Linux_V1.6.5# make### 安装busybox
quectel-CM 调 用 busybox udhpc 获 取 IP 和 DNS , busybox udhpc 调 用 脚 本 文 件/usr/share/udhcpc/default.script 为 Linux 开发板设置 IP、 DNS 和路由表。
防止安装busybox中报错,提前安装以下工具
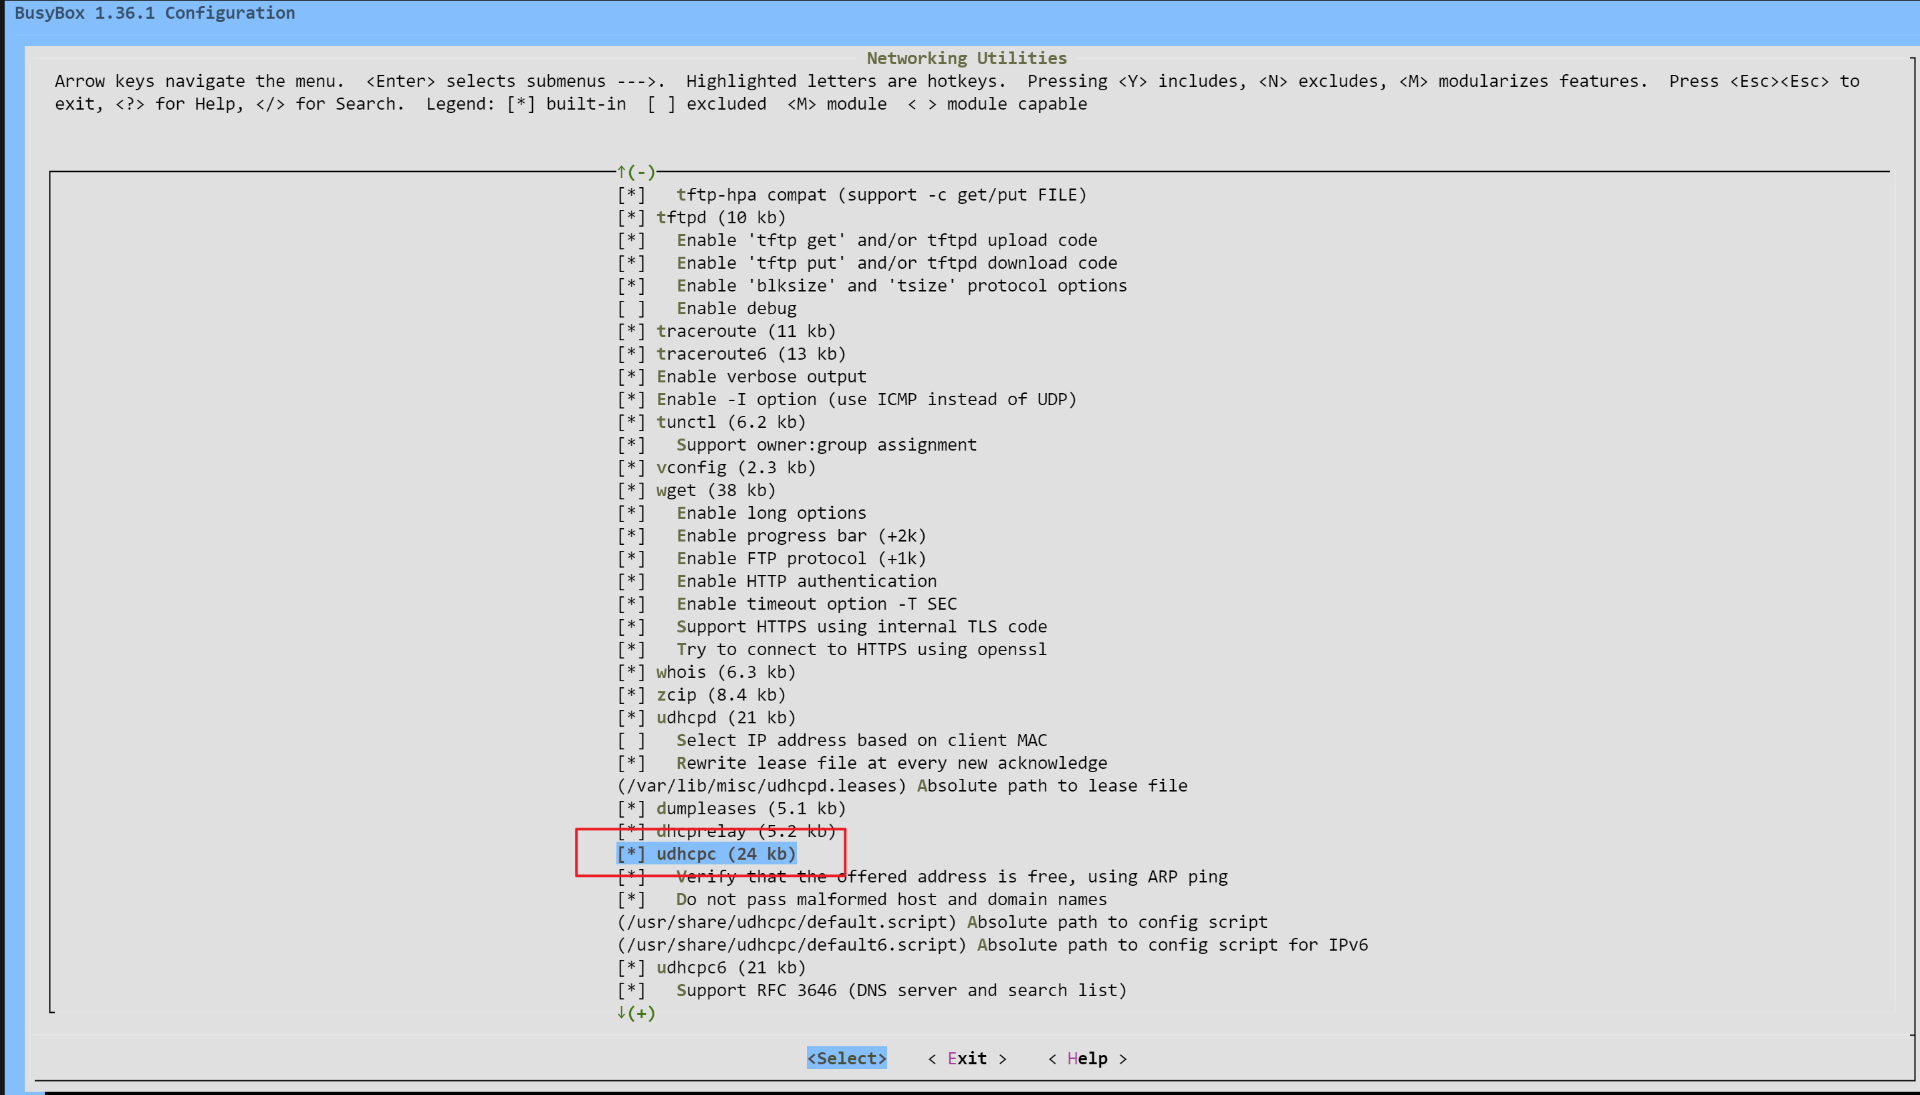
root@pve:~# apt-get install libncurses5-dev从https://busybox.net 下载 busybox工具的源代码,解压并进入busybox目录,使用以下命令启用CONFIG_UDHCPC。
root@pve:~/busybox/busybox-1.36.1# make menuconfig勾选Networking Utilities ---> udhcpc,如图所示。
将脚本文件examples/udhcp/simple.script 复制并重命名到/usr/share/udhcpc/default.script。
执行make install命令安装busybox。
root@zy-pve:~/busybox/busybox-1.36.1# make install回到拨号软件目录,执行如下拨号命令获取IPV4和IPV6公网IP。
root@pve:~/wwan/Quectel_QConnectManager_Linux_V1.6.5# ./quectel-CM -4 -6 &使用ifconfig查看成功拨号后的效果
wwan0: flags=4305<UP,POINTOPOINT,RUNNING,NOARP,MULTICAST>  mtu 1500
        inet 10.95.xx.xx  netmask 255.255.255.252  destination 10.95.xx.xx
        inet6 2409:8962:2e6:xxxx:xxxx:xxxx:xxxx:xxxx  prefixlen 64  scopeid 0x0<global>
        unspec 00-00-00-00-00-00-00-00-00-00-00-00-00-00-00-00  txqueuelen 1000  (UNSPEC)
        RX packets 214369  bytes 194624166 (185.6 MiB)
        RX errors 804  dropped 0  overruns 0  frame 0
        TX packets 139498  bytes 17185235 (16.3 MiB)
TX errors 0 dropped 0 overruns 0 carrier 0 collisions 0使用ping www.baidu.com测试网络。
root@pve:~# ping www.baidu.com
PING www.baidu.com(sc.10086.cn (2409:8c00:6c21:1051:0:ff:b0af:279a)) 56 data bytes
64 bytes from sc.10086.cn (2409:8c00:6c21:1051:0:ff:b0af:279a): icmp_seq=1 ttl=51 time=97.9 ms
64 bytes from sc.10086.cn (2409:8c00:6c21:1051:0:ff:b0af:279a): icmp_seq=2 ttl=51 time=71.0 ms
64 bytes from sc.10086.cn (2409:8c00:6c21:1051:0:ff:b0af:279a): icmp_seq=3 ttl=51 time=105 ms
64 bytes from sc.10086.cn (2409:8c00:6c21:1051:0:ff:b0af:279a): icmp_seq=4 ttl=51 time=68.9 ms
64 bytes from sc.10086.cn (2409:8c00:6c21:1051:0:ff:b0af:279a): icmp_seq=5 ttl=51 time=103 ms
^C
--- www.baidu.com ping statistics ---
5 packets transmitted, 5 received, 0% packet loss, time 4005ms
rtt min/avg/max/mdev = 68.933/89.148/104.977/15.830 ms
root@pve:~#
使用crontab配置PVE系统启动后进行拨号。目录路径修改为拨号软件的存放路径。
root@pve:~# crontab -e

@reboot cd /root/wwan/Quectel_QConnectManager_Linux_V1.6.5 && ./quectel-CM -4 -6 &
如果需要关闭拨号,可以使用如下命令。
root@pve:~# killall quectel-CM